Imagine these scenarios:
- A developer pastes a 15-line production code into ChatGPT to debug it.
- A salesperson uploads a client document containing personal details for summarization.
- A marketing analyst enters a few rows of customer email addresses to test a campaign idea.
In all these cases, sensitive data is already exposed in ChatGPT before the user even realizes it. This unchecked use of AI, often called shadow AI, significantly increases the risk of data leaks, compliance violations, and security breaches in Microsoft 365. However, simply blocking ChatGPT at the firewall is no longer enough. Users can still access AI tools from personal laptops, mobile devices, or even alternative AI platforms outside the organization’s security perimeter. 😰
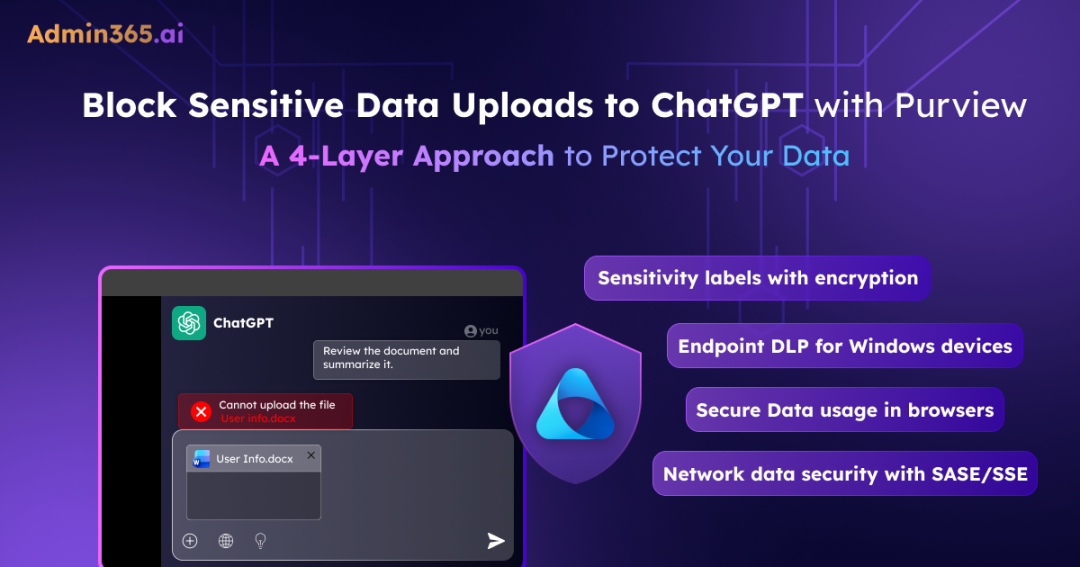
This is where Microsoft Purview comes in. With its four-layer defense strategy, you can prevent sensitive data from being pasted, uploaded, or typed into AI prompts before it leaves the user’s device. In this blog, we’ll walk through how to block users from uploading sensitive data to ChatGPT using Microsoft Purview and reduce the risk of data exposure.
How to Block Users from Uploading Sensitive Data to ChatGPT Using Microsoft Purview?
Below are the four layers of Microsoft Purview security and how each one works.
- Apply sensitive labels with encryption
- Deploy Endpoint DLP on managed Windows devices
- Set up browser data protection
- Microsoft Purview network data security
Prerequisites to Block Uploading Sensitive Data to ChatGPT
You must have following prerequisites in place before configuring any of the above layers.
- Billing Requirement: You must have enabled Pay-as-you-go services in your tenant.
- Licence Requirement: You must have a Microsoft 365 E3 or E5 licence. E3 covers basic sensitivity labels; E5 or the Compliance add-on is required for Endpoint DLP and advanced protection features.
- Role requirement: You must have the Compliance Administrator or Global Administrator role to create and publish labels and DLP policies.
Once the pre-requisites are in place, you can block users from uploading sensitive data to ChatGPT using Purview.
1. Apply Sensitivity Labels with Encryption
This is one of the most effective protections against data leakage to Shadow AI and protects the content itself. When encryption is enabled on a sensitivity label and that label is applied to a file, the file is cryptographically locked. So, if a user tries to upload a labelled file to ChatGPT, the AI receives nothing but scrambled, unreadable ciphertext. It cannot decrypt it, read it, or summarise it, regardless of which device, browser, or network the user is on.
This makes it the only layer that covers BYOD users, personal devices, and users on networks outside your control, without any additional configuration on their end.
All you need to do is apply sensitivity labels to your high-sensitivity content and enable encryption for those label tiers. Once labelled, the protection follows the data wherever it goes.
However, it is important to note that this layer only protects labelled content. If a user types sensitive information directly into ChatGPT, copy-pastes an unlabelled document, or manually rewrites sensitive content from memory, encryption does not come into play. That is why the remaining three layers exist, to catch what this layer cannot.
2. Deploy Endpoint Data Loss Protection (DLP) on Managed Windows Devices
The second layer of protection is Microsoft Endpoint DLP. This layer protects at the device level, allowing you to block specific user actions, but only on Windows devices that you manage and have onboarded to Microsoft Purview. These actions include paste to browser, file uploads, copy to clipboard, and uploads filtered by sensitivity label.
Unlike Layer 1 which protects the content itself, this layer protects at the device level. It monitors and enforces policies on onboarded Windows and onboarded macOS devices in Purview. It catches the sensitive data before it leaves the endpoint, regardless of which AI tool the user is trying to send it to.
Here is the catch. This layer only works on Windows devices you manage. iPhones, Android phones, and personal laptops your team brought from home are completely out of scope. macOS support is available but it lags behind Windows. If your environment includes a significant number of unmanaged or BYOD devices, Layer 1 remains the primary line of defense.
Now, let us walk through how to configure Endpoint DLP in Microsoft Purview. You can do this in two ways:
Use DSPM for AI to Identify and Apply Recommended Policies
Before building a custom policy, it is worth checking the DSPM for AI recommendations in Microsoft Purview first. Microsoft ships a set of ready-made DLP policies that bundle the most common rules. Instead of configuring everything from scratch, you can enable them with a single click, and they are ready to enforce. To get these one-click DSPM for AI recommendations, follow the steps below.
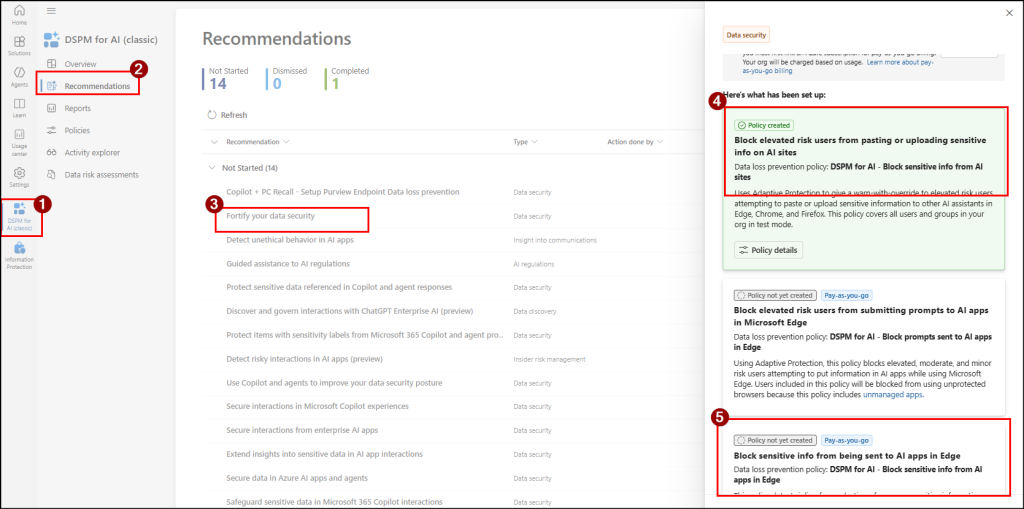
- Sign in to the Microsoft Purview portal.
- Navigate to DSPM for AI (classic) → Recommendations → Fortify your data security.
- In the Data Security for AI flyout page, you can see two recommendations matter for this scenario:
- Block elevated risk users from pasting or uploading sensitive info on AI sites – This policy targets any elevated-risk user who tries to paste or upload sensitive content into an AI app on Edge, Chrome, or Firefox hits a block-with-override prompt. The policy ships in test mode by default so you can watch before enforcing.
- Block sensitive info sharing to AI apps in Edge – This policy enables inline protection directly in the Edge browser. Once active, Edge starts catching common sensitive information types in real-time. Any matching prompt is stopped before it ever leaves the browser when users are inside AI apps.
- Click through the recommendation, scope to the users or groups you care about, and let the policy ingest a few days of activity in test mode before you flip it to block.
Build a custom Endpoint DLP policy
When the one-click policies don’t quite fit your scenario, you can create a custom Endpoint DLP policy by following the steps below:
- Sign in to the Microsoft Purview portal.
- Navigate to Data Loss Prevention → Policies → Create policy and select Enterprise application & devices.
- On the template page, select category as Custom, regulation as Custom policy, and click Next.
- Give the policy a name and description, then click Next.
- On the Assign admin units page, leave it at full directory unless you are scoping to a specific group, then click Next.
- Under Choose where to apply the policy, turn off all locations except Devices and click Next.
- Under Define policy settings, select Create or customise advanced DLP rules and click Next.
- Conditions: Add the sensitive information types relevant to your organization such as credit card numbers, Social Security Numbers, or custom regex patterns for client IDs. Sensitivity label-based detection and trainable classifiers are also supported.
- Actions: Set Upload to a restricted cloud service domain and Paste to supported browsers to Block. Optionally, you can add Copy to clipboard to prevent users from copying labelled content entirely.
- Restricted cloud service domains: Add chatgpt.com.
- Click Next, review the policy, and set it to Simulation mode before turning it on.
Do not skip simulation mode. Run the policy in simulation for at least a week and review the DLP Activity Explorer for false positives before switching to enforce. Turning on a block-all policy in production without testing will cause an immediate surge in helpdesk tickets.
Configuring a Paste Block Rule Does Not Automatically Cover File Uploads
If a user drags a labelled Word document into ChatGPT’s attachment button, the paste rule never applies, the file goes through unblocked.
To close this gap, create a second rule specifically for the file upload path. Under Actions, select Block upload of files based on sensitivity label and filter on the labels your organization treats as sensitive, such as ‘Confidential’ or ‘Highly Confidential’. Once in place, users will be unable to upload any file carrying those labels to ChatGPT, regardless of the file format.
3. Set up Browser Data Protection
Most admins assume Endpoint DLP covers everything that happens in the browser. It does not and this is a gap that gets missed constantly.
Endpoint DLP catches paste and file upload actions because those are operating system events. But when a user simply types sensitive content directly into a ChatGPT prompt box, that is a browser event, not an OS event. Endpoint DLP never sees it, and that is exactly why Browser Data Security exists as a separate layer.
Browser Data Security for Microsoft Edge
When a user is on ChatGPT inside Microsoft Edge, Browser Data Security watches everything they type and paste into the prompt box in real time. The moment the content matches a DLP condition such as a credit card number, a labeled phrase, a custom regex, Edge blocks the submission before it leaves the browser. Your user sees the block message, and the prompt never reaches ChatGPT’s servers.
Microsoft Purview Browser Extension for Chrome and Firefox
The above said ‘Browser data security’ capability is built natively into Microsoft Edge only. Chrome and Firefox do not have it. To get the same coverage on those browsers, you need to install the Microsoft Purview Browser Extension on each device.
It extends the same DLP policies to Chrome and Firefox, so your Block elevated risk users from pasting or uploading sensitive info on AI sites policy fires on Chrome too once the extension is in place. Without it, users on Chrome or Firefox have a gap that neither Endpoint DLP nor Edge protection covers.
Points to Note
- Confirm your Chrome users are on Windows 10 x64 build 1809 or later before you deploy. Older builds won’t run the extension.
- The extension only activates when a policy condition trips. Routine browsing isn’t logged; this isn’t continuous surveillance.
- For organization-wide deployment, push the extension via Intune or Group Policy. Hand-installing it on one machine works for proof-of-concept, but managed deployment is required for production.
- Safari on macOS is not covered by the extension. If you have Mac users on Safari who need real-time browser-level protection for AI prompts, your options narrow to Layer 4 or move them to Edge.
Two-Layer Browser Control to Protect Sensitive Data
For tenants that want strong control, the recommended pattern is to combine two browser-level controls:
- Block unmanaged browsers from accessing AI sites entirely using Conditional Access or an app-control policy. Users must be in a managed browser to reach chatgpt.com.
- In the managed browser, run Browser Data Security (Edge) or the Browser Extension (Chrome / Firefox) to inspect prompts.
Here, the first layer narrows the attack surface to known browsers and the second inspects what those browsers send. Together, the two close the most common paths a user takes to leak sensitive content.
4. Microsoft Preview Network Data Security
After the first three layers, managed Windows devices, Edge users, and Chrome/Firefox users via browser extension are covered. However, these protections are still limited to managed environments and do not extend to native AI apps, mobile clients, third-party plugins, API calls, or browser add-ins.
This is where Microsoft Purview Network Data Security comes in. It works at the network layer by inspecting sensitive data flowing to cloud applications. When properly configured alongside your existing SASE or SSE solution, it helps enforce data protection policies across all traffic paths, including those outside browser-based controls.
To enable this layer effectively, organizations must configure the network data security within their SASE/SSE architecture so that traffic is routed through the inspection point. Once integrated, it captures data flows that the previous layers cannot reach, regardless of device, browser, or application in use.
If a SASE or SSE stack is already in place, Network Data Security can be enabled as an additive control with minimal disruption. However, it is not a standalone deployment, and it relies on a network appliance or security proxy in the data path. Without that underlying network integration, this layer cannot be operationalized.
Limitations of the Four-Layer Security Approach
Even with all four layers in place, you are not at 100% coverage to block uploading sensitive data to ChatGPT. There are still important gaps to be aware of:
- Personal devices did not onboard to Microsoft Purview: Endpoint DLP only works on onboarded devices. A user’s personal or home PC remains outside of enforcement. While sensitivity label encryption (Layer 1) can still protect labeled content, it does not cover everything once data leaves managed environments.
- AI sites not on Microsoft’s supported list: Microsoft’s monitoring capabilities (such as Communication Compliance, eDiscovery, and retention) apply only to a defined set of AI services like ChatGPT, Microsoft Copilot consumer experiences, Google Gemini, and DeepSeek. DLP-based controls can extend further using restricted domain lists, but the AI ecosystem evolves quickly, and new tools often appear before policies are updated.
- Encrypted traffic that SASE/SSE cannot inspect: TLS inspection has its limits. Pinned-certificate apps and some mobile traffic stay opaque.
- Users who can bypass warning-based controls: “Block with override” policies are useful for user experience and change management, but they are not foolproof. A determined user can still proceed past warnings. For highly sensitive data, a strict hard-block policy is required.
In some environments, organizations can further strengthen protection by leveraging the Microsoft Entra admin center. By configuring controls such as the GSA client, Microsoft Entra SSE, and third-party solutions like Netskope ATP, organizations can further reduce data leakage risks. However, technology alone is not enough; users must also remain careful and follow secure data handling best practices to fully minimize risk.
That’s it! We hope this blog helped you to prevent users from uploading sensitive data to ChatGPT by applying a 4-layer defense mechanism using Purview. Feel free to share your experiences and thoughts in the comments section below. Stay tuned for more blogs.


